Friday, December 19, 2008
French Crepe Party Ideas
The happy problem with French crêpe party is that there is no limitations in terms of the type of fillings you can enjoy, and you end up eating more than everything.
The northwest region of France in Brittany is famous for their crêpes, but nowadays, you see French crêperies everywhere, even in Wellington. And they serve yummy crêpes!
The biggest difference between a French crêpe and an American pancake is their thickness. A French crêpe is so much thinner that you get to enjoy more, with different types of fillings, from savoury to sweet ones.
So, you can imagine that when we hold crêpe parties, there's more fillings than your stomach can hold. It's not a lot of work or pre-cooking, as we use basic ingredients like butter, sugar, nutella, bananas, strawberries, bacon, mushrooms, shredded cheese, walnuts, blue cheese, lemon juice, eggs, almonds, liquor, orange, cinnamon...
One problem with making crêpes is that, they are best enjoyed when they are hot. So if you're making crêpe on your frying pan, it makes serving everyone at the same time difficult. The French (or rather Tefal) have found a happy solution to this problem with the Multi Crêpe Party device. You basically plug it and put on your dining table, and everyone surrounds it like a steamboat and makes their own crêpe together. It makes 6 much smaller crêpes at the same time. It's fun, and useful even for parties of more than 10. Everyone just end up standing around the table, cooking and eating. However, this electronic device may be hard to find outside France, but they are widely available in stores like Carrefour or Darty in France (we actually went to the trouble of carrying one back from France).
Crêpe batter
Serves about six
250g flour
3 eggs
500ml milk
pinch of salt
about 1 teaspoon of melted butter
water
Mix flour and egg. The mixture gets very thick and dry. Add milk slowly until you get a smooth batter. Add butter and salt.
We find that the batter could be thinner, and usually add about half a cup of water and more milk, so that the crêpe spreads thinner.
Chill in fridge for about half an hour.
To cook, spread a thin layer, one at a time, on frying pan or use a multi crêpe party device.
To serve, add fillings, fold into half or quarter, or just simply roll up.
Simple Crêpe Fillings suggestions
Savoury
Bacon: This is always a winner. Fry them until they are crispy. Top with shredded cheese or mix with mushrooms.
Mushrooms: You can stir fry mixed button mushrooms (diced into small cubes) with olive oil, garlic and chopped fresh parsley (seasoned with salt and black pepper). Another alternative is to fry with bacon (and chopped onions), add some fresh cream, season with herbs, salt and black pepper).
Eggs: Beat an egg into the multi crêpe party, you get a perfect round sunny side up. Put it on top of the crêpe and add bacon and cheese if desired.
Blue cheese and Walnut: For the slightly more exotic taste buds. Popular with our crêpe party guests so far.
Sweet
Butter, sugar and cinnamon: My all time favourite! Melt them altogether on the crêpe and eat it while it's hot. Sinfully good.
Sugar with lemon juice: For some tangy punch, squeeze some lemon juice onto sugar.
Banana or strawberries with melted chocolate: Always pair well together.
Banana with milo: A great pair here too
Banana with orange: We tried cooking banana with orange juice/pulp. Something new for a change.
Banana and honey: Classic
Strawberries with sugar: Tried it yesterday and it's good.
Ice-cream: If you're fast to eat before it melts on the hot crêpe.
Liqueur: You can make a Crêpe Suzette by putting sugar and liqueur such as rum on it (with fruits like bananas), and setting it on fire. Sure to capture everyone's attention.
Jam: Or basically, just scour through your pantry for anything that you find suitable. It will ensure a successful crêpe party with a big spread of fillings to satisfy every palate.
note: Crêpes in pictures shown are made this morning with leftover batter from our crêpe party last night, using a normal frying pan.
Monday, December 15, 2008
Fresh Pasta with Prawns and Scallops
So what do you think I would do with the leftover fancy ingredients from the fancy Pre-Christmas dinner. Well, cook up another fancy meal the next day.
With leftover scallops and fresh lasagna sheets, we made another buttery seafood pasta. We had reckoned that a tomato or cream base would be too overpowering and mask the taste of the fresh scallops. It's very simple and fast, and can be done with dried pasta. Recipe has been adapted from my ultimate fish cookbook.
The dish also gives us the pleasure of using our fresh parsley from the pot, which is growing very well. Growing our own herbs doesn't actually save us any money, as we end up spending on soil, fertiliser, pots, even organic pesticide...but it gives us much pleasure to pluck them whenever we need them.
Fresh Pasta with Prawns and Scallops
Serves two
Pasta (quantity left out, as I find that different people have different portion size)
handful of prawns
handful of scallops
50g unsalted butter
2 garlic cloves, crushed
2 tablespoon fresh parsley, chopped
salt and ground black pepper
As we were using our lasagna sheets, we trim them into thin strips. Lasagna sheets give much flexibility, can try cutting heart shapes out of them for a valentine's dinner perhaps. :)
Cook pasta in large pan of lightly salted boiling water.
Melt butter in a large heavy pan with the garlic and parsley. Toss in the prawns and scallops and cook over medium heat for about 8 minutes, until the seafood are cooked.
Drain pasta thoroughly and rinse with boiling water to remove any starch.
Stir pasta into the prawn mixture. Season with salt and pepper and serve immediately.
Sunday, December 14, 2008
Tiramisu in Chocolate Cups
The last fancy dish of the pre-Christmas dinner is Tiramisu.
We've made Tiramisu several times to pretty great success. Our friend Aure has a particularly good recipe which we liked.
This time, we tried a new recipe, partially from a newly acquired cookbook "The Chocolate and Coffee Bible". It's from the same publisher (Hermes House) as my ultimate fish book and contains a wealth of information about chocolate and coffee, from history, types, quality, brands to recipes and decoration tips.
Tiramisu always present a challenge when it comes to serving, as it's difficult to cut without collapsing. Such that it may be easier to make individual servings in glass.
Well, chocolate cups make even fancier serving dish than glass.
Tiramisu in Chocolate Cups
about 4 servings, depending on how generous you are with each portion
1 egg yolk
2 tablespoon brown sugar
a little vanilla essence
1 generous cup of mascarpone
1/2 cup strong black coffee
2 tablespoon coffee liqueur (or almond essence) - we forgot to add. still good.
sponge biscuits
cocoa powder for dusting
For the chocolate cups
150g dark chocolate
2 tablespoon unsalted butter
For the cups, cut out 4 rounds of baking paper. Melt chocolate with butter in a bowl set over a pan of simmering water. Stir until the mixture is smooth, then spread a spoonful over each circle to within 2 cm of the edge. Try to not spread too thin (about 1mm thick), otherwise it would be difficult to remove the paper without breaking the cups.
Lift each paper round and drape over an upturned teacup so that the edges curve into frills. Put into the fridge to set (it's faster this way). Then lift off and peel off the paper to reveal the chocolate cups.
It's the same for making chocolate leaves. Spread the melted chocolate onto, say a mint leaf and leave to set before peeling off the leaf.
Make the Tiramisu filling. Using an electric mixer, beat the egg yolk and sugar in a bowl until smooth, then stir in the vanilla essence.
Soften the mascarpone if necessary, then stir it into the egg yolk mixture. Beat until smooth. Set aside.
Mix coffee, liqueur. Break up the sponge biscuits roughly (1 inch length).
Place the chocolate cup on individual plates. Dip each piece of sponge biscuit very briefly into the coffee and place in the cup. Soaking the biscuits too long in the coffee will result in the Tiramisu becoming wet and soggy and losing its shape.
Put a layer of biscuits, then spoon over the mascarpone mixture, top with another layer of biscuits, followed by more mascarpone. Repeat for the other cups until you run out of either mascarpone mixture or sponge biscuits.
Chill for at least 30 minutes. Dust with cocoa powder before serving.
Open Ravioli with Parma Ham, Asparagus and Basil Butter
Wellington is known for its cafe culture. We have so far spent many a weekends exploring the diverse selection of cafes, each with its unique and individualistic character. Well, I don't really drink coffee, but always enjoy my brunch at a local cafe, each with a different menu and using the freshest local ingredients in season. Many times, at a place with a view to die for, be it by the wild coastline, in a valley, nested in a quiet suburb or by a busy street.
And some Italian cafes make you linger longer (and spend more) with their gourmet store alongside the cafe. Like this one, that we passed by, and ended up with a salami, mascarpone and Parma ham (all not quite local), after we said we are planning to prepare a nice dinner of ravioli and tiramisu, and looking for dried sausage for a camping trip. They certainly cost more, but the Parma ham is oh so good.
Well, it was supposed to be a fancy dinner, so we ended up with fancy ingredients. Very Italian too with recipe from my "easy Italian in minutes" cookbook, except that we replaced sage with basil. It's quite straightforward to prepare.
Open Ravioli with Parma ham, asparagus and basil butter
serves two
100g asparagus
125ml white wine
65g butter, cut into tiny cubes
half teaspoon white wine vinegar (we used red wine vinegar, I guess the deviation is not significant)
bunch of fresh basil, finely chopped (important to have fresh herbs for this)
Parma ham, cut into thin strips (recipe calls for 60g)
Parmesan, shaved
salt and pepper
125g fresh lasagna sheets (having fresh pasta really makes the difference)
Cook the asparagus gently with the tips out of the water for 3-4 minutes in boiling water until tender.
Heat the wine and reduce the liquid to 1 teaspoon, then slowly add the butter over low heat. Add vinegar and season to taste. Carefully fold in the chopped basil.
Cook the fresh lasagna sheets according to the pack instructions (we're not adventurous enough to make our own pasta yet).
Arrange one lasagna sheet on a plate and spread with a little herb butter, then place some of the cooked asparagus and strips of Parma ham on top. Layer up with more sheets of lasagna and filling. Repeat for the other portion.
Using a vegetable peeler, shave the Parmesan cheese and sprinkle over the pasta.
Parfait.
Scallop Ceviche
The Ceviche is a popular appetiser in Latin American countries. Each country from Mexico down to Chile have their own touch of individuality.
The dish basically involves marinating and cooking fish or seafood in citrus such as lime or lemon. Traditionally, you have to marinate for about 4 hours for the seafood to be 'cooked', but we cheated a bit by blanching our scallops with boiling water to save us some time.
Our resulting ceviche is 'created' after looking at several recipes and adapting them to what we have and like.
Scallop Ceviche
Serves two
100g scallops
1 yellow peppers
1 clove garlic
1 thumb size red chili
2 lemons (limes work better, being more acidic, but they were sold out in the supermarket)
half a grapefruit
Olive oil
Coriander leaves
Slice scallops horizontally.
Squeeze enough lemon or lime juice to submerge the scallops entirely in the juice and leave in fridge for 4 hours. If you're short of time, like us, blanch the scallops with boiling water first before marinating them in the citrus juice.
Chopped garlic and chili. Slice the yellow pepper thinly and cut the grapefruit flesh. Mix everything and add a little olive oil.
When the seafood is ready, add into the mixed fruit/vegetables. Garnish with coriander leaves and serve within 2-3 hours.
Our Pre-Christmas dinner
Since we may be stuck in some remote small town, or even in a tent in the South Island on Christmas, cooking instant noodles over a small camping stove, we thought we might as well have a nice dinner one week earlier.
Being in recession mode, and also for the pleasure of cooking something fancy, we decided against going to a fancy restaurant. Afterall, we've been dining out quite a lot recently.
Yet, being in festive mode, we spent some effort in gathering nice ingredients, and more time and energy in preparing it. After three intensive hours, the result was quite rewarding.
Starter came in the form of Scallop Ceviche, a Latin American dish. Main course was Open Ravioli with Parma Ham, Asparagus and Basil Butter. Dessert was Tiramisu presented in a delicately 'crafted' choclate cup. No extra space for aperitif, cheese or bread.
Will share recipes in upcoming posts.
Monday, December 08, 2008
Strawberry Tart with Crème Pâtissière
Strawberry season certainly rocks. With this deliciously seductive fruit in season in New Zealand now, we can't resist buying one pack after another, especially when they look so lusciously sweet and affordable. And of course, we have no more excuse not to make some strawberry dessert.
In Singapore, strawberries are not only pricey, they are also seldom sweet, being all imported and probably harvested before they are ready to be eaten to endure the long journey.
Originally torn between making a Strawberry Tart or a Strawberry Charlotte, Rémi couldn't wait to sink his mouth into his dessert and opted to make a tart (you need to chill a charlotte for at least a few hours).
French Pastry Cream (Crème Pâtissière) is used to line the sweet tart. To Rémi, the difference between a good pastry and a lousy pastry can be judged by the amount of cream used in the tart. Stingy pastry makers who are out to cut cost tend to use more cream than fruits.
Our cream recipe comes from Camille's classic French cookbook again. In her dessert section, she carries several types of dessert cream and sauces, including Crème Chantilly, Crème Anglaise, Coulis de Fruits Rouges, Sauce au Chocolat and Sauce au Caramel au Beurre Salé. Well, we shall see if we will try each and everyone of them.
French Pastry Cream (Crème Pâtissière)
makes slightly more than one tart
1 egg plus 1 egg yolk
15g flour
15g corn flour
65g sugar
25ml milk
vanilla essence
Bring milk with vanilla essence to boil, and let it stand for 10 minutes.
Whip the egg and yolk with the sugar until it has double in size and paled in colour. Then add the flour and corn flour, and add the warm milk gradually while continuing to whisk.
Put back onto fire and let the mixture thickened while beating continuously and strongly so that the cream does not stick to the bottom of the pot. Remove from heat and continue to whisk for 1 minute.
Strawberry Tart
Serves 4
1 sweet pastry dough (pâte sucrée)
enough strawberries to pack the size of your tart
strawberry jam
Make the sweet tart dough. Bake at preheated oven at 200C for about 10 minutes. Allow to cool.
Make one portion of crème pâtissière. Spread on the cooked tart. Halved the strawberries and line them on top of the cream.
Dilute the jam lightly with some water and use it as a glaze over the strawberries. Chill before serving.
Sunday, December 07, 2008
Camille's Cheese Soufflé, just like mom did it
Rémi has the credit to this beautifully puffed up Cheese Soufflé. I've seen soufflé many times but not really tried it. So, no basis for comparison whether it tastes as good as real, but according to him, it is just as his mom did it. Pretty good. And the big ramekin was just bought yesterday specifically to satisfy his soufflé craving.
Recipe comes from the ever trusty Camille's classic French cookbook.
What I learned is that every soufflé is made from 2 basic components:
1. a French Creme patissiere base/flavored cream sauce or purée
2. Egg whites beaten to a soft peak meringue.
And other than cheese, soufflés can have chocolate, banana, lemon, jam and berries in its base.
Cheese Soufflé (Soufflé au Fromage)
Serves 2
20g butter
20g flour
200ml milk
2 eggs
70g gruyère cheese, cut into small pieces
ground nutmeg
salt, pepper
Preheat oven at 220C.
Melt butter on low fire. Add the flour and stir until evenly mixed.
Remove from fire, and add milk, a little at a time. Stir until the mixture thickens and becomes creamy.
Add the cut cheese and egg yolks. Separately, beat the egg whites until hard, and gently add the egg white into the first mixture.
Pour into soufflé mould, or big ramekin and bake at 220C for 20-25 minutes. Do not open the oven door during the cooking process, and serve immediately. Soufflé doesn't wait and will collapse very quickly. Luckily, we managed to grab a few snapshots.
Friday, December 05, 2008
Quick Sambal Ladies Fingers and Garlic Butter Prawns
My way of cooking the ladies fingers and prawns may not be the best in town, but it's my suggestion of what to do when short of time. Especially when I'm running late and have no time to defreeze meat (I don't believe in microwave oven).
I love ladies fingers. Strange name, isn't it? But the pods do look like it. I wonder if there's any plant name "men's toes". Must be round and very hairy.
Ladies fingers are also know as Okra. They are of African origins and well-loved in Singapore and Malaysian cooking (though I know of friends who would not eat them too). It's common in Yong Tau Foo soup noodles, and can be stuffed with fish paste, or just simply blanched in soup. It's also added into Assam Fish, together with brinjal (egg plant), tomatoes, pineapples...yummmmmy.
And ladies fingers are fantastic when cooked with sambal chilli, just like Kangkong (water spinach, it's another vegetable that deserves a separate entry).
If you go the traditional way of making the sambal chilli, you'll like have to take out the pestle and mortar and start pounding dried shrimps, belacan, shallots, chillies together (I remember using a blender during my school days, much quicker). But I'm suggesting my shortcut method here with ready made sambal chilli. And you can do the same for kangkong too.
Quick Sambal Ladies Fingers
Serves two
150g ladies fingers
1 big teaspoon of ready sambal chilli sauce, easily found in any Asian grocery store
1 shallot
1 garlic
1-2 teaspoons dried shrimps
Soak the dried shrimps in water to soften it. Use warm water if you're short of time.
Chopped shallot, garlic and dried shrimps. Mix with the sambal chilli sauce. You may like to squeeze a little lime juice into the paste if you have some.
Cut the ladies fingers diagonally.
Heat oil in frying pan. Add in the mixed sambal chilli paste and stir fry for a few minutes until fragrant, but without burning.
Add in the ladies fingers and mix well with the chilli paste. Add about half cup to a cup of water to prevent the chilli paste from burning. Fry for about 3-5 minutes and dish out.
Serve with rice.
Garlic Butter Prawns
Serves two, with the ladies fingers and rice
Prawns (number depending on how generous your portion is. I'm stingy, so have 4 small prawns per person, it's fair and equal and no one gets more)
Garlic (also according to taste, I love garlic, so use about 4-5 and still think not enough)
1 teaspoon butter (well, this would be according to your conscience too)
Sugar and salt
corn starch
Remove shells from prawns. If using frozen prawns like me, unfreeze under cold running water to save time. Coat with corn starch.
Chopped garlic.
Melt butter in frying pan, add garlic and fry for 1-2 minutes until lightly brown and fragrant. Add the prawns. Sprinkle sugar and a pinch of salt. Can consider garnishing with lemon slices too.
Serve with the above. Both dishes here are quick to prepare.
Monday, December 01, 2008
Getting to the heart of an Artichoke
I was introduced to the Artichoke by Rémi. Just like a Westerner may be baffled by a durian, I was stumped by how to eat this edible bud of a thistle that originates in the southern Europe around the Mediterranean.
I kind of consider this blog in part, a project to learn more about what goes through my mouth into my body (think our generation's obsession with highly processed food which greatly distorts the original look, taste and feel of many ingredient).
From what I find out, the main producers of artichokes are France, Italy and Spain, which is why it is a common starter to a French meal. In Chinese, it is 朝鲜蓟(ji),or菊蓟、菜蓟、法国百合、荷花百合...but I do not recall this being commonly used in Chinese cuisine.
To eat it, you have to peel each leaf petal, one by one, dip in whatever dressing, and sip or chew the bottom (the side enjoining the stem) flesh off. I find this process truly unsatisfying, because the flesh is tender and tasty and leaves you craving for more. Yet, there's so little to suck off the leaves.
The joy comes when you reaches the heart. But before eating your heart out, you have to remove the "choke", which is the fine prickly hairy growth covering the heart of the artichoke. The heart of the artichoke is usually the most prized part that is used in restaurants (such that I may have tasted the artichoke many times without knowing how it looks like). Discard the leaves. The stem is said to be edible if well-cooked, but oops, I didn't know and threw it away.
To cook an artichoke, Rémi found that the fastest and easiest way is to steam for about 15 minutes. One can also boil it uncovered for about half an hour. Camille's French classic cookbook has also three artichoke recipes, all of which require more than an hour of baking or simmering. The tips of the leaves is quite sharp, which is why it is not uncommon to cut them off before cooking.
To make the dip, one suggestion is to combine olive oil, Dijon mustard and balsamic vinegar. Yummy.
Thursday, November 27, 2008
Veal in white sauce (Blanquette de Veau)
Quite a few very traditional French dishes actually go well with rice, and Blanquette de Veau is one of them.
I always thought that rice is very Asian, and in Camille's classic French cookbook, she has recommended rice as the accompanying side dish for several recipes, which left me wondering. It's quite common for Rémi's family to serve rice, but I have always assumed their family is the exception than the rule.
So, I learned that Carmargue in Southern France is actually a rice-producing region. This place is famous for pink flamingos, which incidentally can't read signs telling them to keep off crops and thereby a headache to the French rice growers (there's this interesting book History of Food that gives a fascinating history of rice, among others, google to read extracts of the book).
How do French cook rice? From what I heard, I'm afraid their version of boiled rice is incomparable to that churned by any Asian rice cooker. That they cook rice like pasta, boiling them in water, and straining them.
So, I'll rather serve my delicious veal with Thai rice, cooked with my trusty rice cooker. The white sauce goes very well with rice.
Veal in white sauce (Blanquette de veau)
Serves two
250g veal (meat of young calves)
1 big carrot
1 onion
1 leek (I substituted with asparagus, probably not a good idea, but it's not every week that I have leek in stock)
1 onion
2 sprigs of parsley, 1 sprig of thyme and 1 bay leaf
1 clove
For white sauce:
15g butter
15g flour
1 egg yolk
125ml fresh cream
1/2 lemon
salt and pepper
Stick the clove into the onion. Put vegetables, veal, herbs, salt and pepper into a pan and cover with water. Bring to boil and simmer for about 2 hours. Remove the white froth forming at the surface.
Before serving, melt butter and mix in the flour and 3 big scoops of the vegetable broth. Beat the egg yolk, fresh cream, lemon juice together and stir into the butter and flour mixture. Add in more vegetable broth if necessary. Season with salt and pepper.
To serve, put veal and vegetables on serving plate and pour white sauce over. Serve with rice.
The vegetable broth is very rich and tasty too, I'm currently freezing it as vegetable stock. Not sure how I can use it yet, but it's going to be an experiment.
Tuesday, November 25, 2008
Chinese Egg tart with a French twist
I definitely wasn't expecting good results for my first Chinese egg tart experiment, but I was in for a pleasant surprise.
I've googled different egg tart recipes, and there's so many different ways of making it, just as there are many types of egg tarts.
Some are almost like an egg orgy, using more eggs than the crème brûlée. Me being the prudent, health-conscious, stingy homemaker, I opted for one that uses the least number of eggs. I found this egg tart recipe among the stack of old recipes I brought back from Singapore, and its source is unknown. Whoever gave me that, I'm deeply grateful and happy to share. And it is extremely easy to make.
But being too lazy to experiment with a new crust altogether, and definitely not up to making a flaky crust, I've opted to use the French sweet pastry crust (pâte sucrée) by Christelle Le Ru. Even lazier, Rémi, the pastry maker helped me with making the dough the day before. So I just have to gather the egg mixture together, put everything in shape and voilah!
Chinese Egg Tarts with a French twist
Makes about 14
1 sweet pastry dough (pâte sucrée)
Sugar syrup:
200ml water
100g sugar
4 pandan leaves
Custard filling:
Sugar syrup above
2 eggs
50g milk (original recipe calls for evaporated milk, I uses normal milk, with 1 spoon of liquid cream for an extra boost)
Make the dough and chill for 15 minutes.
Press the pastry with your fingers over the base and sides of the prepared cup cake pastry tin. Prick all over with a fork and bake for 10 minutes at preheated oven of 200C.
Make sugar syrup by boiling all the ingredients together. Cover for 10 minutes and allow to cool before using. Remove the pandan leaves (it's possible to find frozen pandan leaves in Asian grocery stores, as how I do. They give the sugar syrup a tinge of very nice and essential fragrance).
For the egg custard filling, mix all ingredients together, including the sugar syrup. Use a strainer to get rid of the unwanted bits from the eggs. The mixture should be smooth and silky.
Pour the egg mixture into the already cooked pastry and bake at 160C for 20-25 minutes.
The egg tart filling should be soft and moist, yet not liquid. And yet not overcooked. So start watching the oven after 15 minutes. The egg custard should be a little puffed up when it jellies.
Original recipe asked for 1 drop of egg yellow colouring, but as I'm quite against food colourings, I omitted it and the natural colour of eggs looked great.
Monday, November 24, 2008
Getting Apple Tart right
For the past few years, finding the key steps to making the simple Apple Tart seems as elusive as understanding a woman having PMS. We tried so many times with different types of apples, we tried pre-cooking the tart dough. We also consulted at least two French mothers who are good at it (this being a very traditional, typically French dessert), and who in turn told us to simply put sliced apples on top of the raw dough and bake it. To them, it's as straightforward as frying an omelette, there's just no science behind it to help you get it right.
Well, out of the say 6-10 times we made the apple tart, we probably only got it right 1-2 times. Either the tart base wasn't cooked well enough, or the apples too dried out, or both. And we couldn't understand why it was successful on those rare occasions. Luck? Maybe.
Last night, we may have found the answer. That is to squeeze as much apples as you could into the tart, so that they will ooze out just enough juices for the perfect apple tart. We had been too stingy with apples before, perhaps.
Apple Tart
1 tart dough (Pâte brisée)
at least 4 apples
sugar
cinnamon powder
Preheat oven at 180C.
Roll out tart dough. Line on a prepared tart tin. Spread apple slices onto the tart, packing as tightly as possible, and into nice patterns if you like.
Drizzle sugar (amount according to how much of a sweet tooth you are) and sprinkle cinnamon powder over.
Bake for about 30 minutes or until golden brown.
Thursday, November 20, 2008
Jamie's incredible baked lamb shanks
Jamie described his baked lamb shanks "incredible", and I'll say the taste is quite truly so. The first time I baked this, I may have baked a tad too long, as the vegetables were all melted into almost nothingness. Last night, on my second try, I'd shortened the cooking time, so the lamb was less brown, but it tasted as good nonetheless.
The lamb was baked for so long in its own fats, as well as butter and olive oil, that it was almost like a confit. The onions and carrots added a sweet twist to the otherwise savoury dish. I omitted leek, simply because I didn't have it in the fridge.
I find Jamie overly generous with oil, so I've reduced the amount of butter and olive oil used. My version may be less good than his for sure, but it'll be less sinful as well. Especially as I also exercised portion control and shared one shank between two persons.
To maximise oven usage, throw 1-2 potatoes to bake together (but for half the time). Serve the lamb with mashed potatoes or just simply baked ones. Below is his recipe done it my way, as I remember it.
Jamie's incredible lamb shanks
for 1 shank
1 lamb shank
2 sprigs of fresh rosemary
1 sprig of thyme
1 spoon of cold butter, quantity according to conscience
4 cloves of garlic, unpeeled
1 carrot
1 onion
extra virgin olive oil
salt and black pepper
white wine
1-2 potatoes
fresh cream or milk
salt and black pepper
Preheat oven at 200C.
Chopped 1 small sprig of rosemary and the thyme into small pieces if you're using fresh ones. Yeah, my rosemary and thyme plants are still surviving after battling gales and storms. Original recipe also uses sage leaves, which I omitted. So please use if you have them. Mix with butter, salt and pepper.
Make incisions into the lamb shank and stuff the flavoured butter into the cut pockets. Rub the lamb with olive oil, salt and pepper.
Finely sliced carrot and onion (and leek if you have). Cut an A3 sheet of aluminum foil, place the vegetables, remaining rosemary (and sage leaves) and whole garlic in the centre. Put the lamb shank, bone upright on top. Splash some white wine over and wrap up entirely in foil.
Bake for about 2 hours or longer, until the meat is tender. Halfway through the baking, throw the potatoes into the oven. When the potatoes are done, mash with some milk or cream, salt and pepper.
Tuesday, November 18, 2008
Berry Christmas Chocolate Log Cake
Christmas to the French is what Chinese New Year is to the Chinese. It's holiday season, and a time for family reunion. Another similar trait is that each French family eat and do the same thing every year for Christmas, just like the Chinese. Or so I believe.
On the eve, by default tradition, my family would gather for steamboat. The double steamboat would have a spicy tom yum soup base on one side, and chicken base on the other side. Steamboat ingredients consist of abalone, pork, beef, fish, squid, mushrooms, lots of vegetables and balls (meat balls, fish balls, sotong ball...). Then, you go to the temple to wish for good luck for the new year.
Lunch on the first day of the new year would be leftovers from the night before, as well as food offerings to ancestors, like roast chicken, roast pork, steam fish...There's no guesswork necessary to know the menu for lunches and dinners for the first few days of the festivities, though each family have their own variations.
For Christmas, I was to discover the same thing happening for the French. Christmas service at the church on the eve before the big reunion dinner on Christmas. The yearly menu is fresh oysters (yum yum), salmon, prawns and fois gras. Dessert comes in the form of the yule log cake. Then, there's the Christmas presents exchange, just like there's ang bao giving for the Chinese.
Christmas day itself, there's always the roast turkey.And leftover log cake (or even a second one with a different flavour). For snacks, there's chocolate truffles, just like the Chinese have their new year cookies and pastries.
The log cake recipe is from Rémi's mom. Berry mousse and chocolate topping are from Christelle Le Ru. Decorating the log cake was fun. I even found recipes for making meringue in the shape of mushrooms, but didn't go to the trouble of doing it.
Berry Christmas Chocolate Log Cake
Serves 6
Cake roll (roulade):
3 eggs, yolks and white separated
100g sugar
80g flour
pinch of salt
Berry Mousse:
100g mixed berries, pureed
50g icing sugar
juice of 1 lemon
100ml fresh cream (for whipping)
50g mixed berries
Chocolate Topping (chocolate ganache):
150g dark chocolate
100ml fresh cream
Start with making the chocolate topping and berry mousse first as you need to use them immediately when the cake is done.
Puree 100g mixed berries (we used blueberry, raspberry and strawberry). Sieve to remove the seeds and mix with icing sugar and lemon juice. Whip the fresh cream. Gently fold the whipped cream into the fruit purée. Carefully mix mixed berries into the cream and refrigerate.
For chocolate topping, melt pieces of chocolate over a water bath. Boil the fresh cream and pour over the melted chocolate. Stir until the chocolate is fully melted and the mixture is creamy. Leave to cool.
Preheat oven to 200C.
Beat the egg yolks and sugar in a mixing bowl until the mixture is smooth and forms a pale yellow ribbon when lifted.
Beat egg whites separately until it is thick and foamy. Gently fold in half the flour, followed by half of the egg whites. Repeat for the remaining half until the mixture is well mixed.
Pour the mixture into a tray (about 35cm by 30cm) lined with greased baking paper. Cook for 10 minutes until golden brown.
Flip out the cake, spread the berry mousse immediately, leaving about 2cm clear on all sides. Roll up from the short end.
Coat the cake roll with the chocolate topping and refrigerate for at least 4 hours. Serve with mixed berries
Tips:
- For ideal results in whipping cream, make sure your cream, beater and mixing bowl are COLD. Refrigerate them for half an hour if necessary.
- For better success in making the egg white meringue, bring eggs to room temperature if they come from the fridge.
Monday, November 17, 2008
The five fragrances of Ngoh Hiang
The Hokkien Five Spice Meat Roll is more commonly known as Ngoh Hiang in Hokkien or Wu Xiang in Mandarin, literally meaning "five fragrances". Well, the famous Five Spice Powder (Wu Xiang Fen) used in Chinese cuisine is also literally translated as "five fragrances" from Chinese.
Five spice powder is so named as it contains all the five flavours (or should we say fragrance) - sour, bitter, sweet, pungent, and salty. Although the specific combination of spices varies nowadays, two standard combination are: 1) Chinese Tung Hing cinnamon (a type of cassia), powdered cassia buds, powdered star anise and anise seed, ginger root, and ground cloves. 2) huajiao (Sichuan pepper), bajiao (star anise), rougui (cassia), cloves, and fennel seeds.
The powder is the key spice in making the Ngoh Hiang. As the meat roll is quite tedious to make, it is a festive dish in Hokkien households (from my observation of my extended family and friends). Besides death anniversaries of ancestors (this may sound strange to foreigners, but anniversaries are celebrated with rich offerings of food in traditional prayers, and the extended family gather together to offer their respect. I see it more as an occasion for family gathering), Chinese New Year is the main period when grandmothers, mothers, aunts etc make this meat roll, along with a big feast of other traditional goodies.
Of course, you can easily find Ngoh Hiang in hawker centres nowadays, but nothing beats the homemade one. Especially when those commercially-made-in-factory ones taste more flour than meat (just like chicken nuggets from MacDonald).
I got the below recipe from my friend PY's mom, who make one of the best Ngoh Hiang. As with most Chinese home cooks, the proportion of ingredients is more by instinct than precision, so use your discretion, as I do when I reduce the quantity in making it. The quantity is huge, as this is a festive dish and so, cooked to feed many many mouths and to last over several meals during the Chinese New Year period.
Yesterday was my first try. There's room for improvement.
Ngoh Hiang (Hokkien five spice meat roll)
makes perhaps 12 rolls
1 large sheet of bean skin
1kg minced pork
300g prawns
20 water chestnuts
2 large onions
2 carrots
10-15 dried shitake mushrooms, soaked
5 stalks coriander leaves
2 tbsp light soy sauce
1 tsp salt
pepper
corn flour
1 packet of five spice powder (I'm not sure how much is this, but use generously, possibly 1 tbsp)
2 eggs
Grate carrots and chopped all ingredients finely. Marinate and set aside for one hour.
Cut the bean skin into smaller squares (or rectangular). Clean them with a damp cloth. It's very fragile, so be careful not to tear it.
Divide up the minced mixture accordingly and roll as tightly as possible like a sausage.
Deep fry in hot oil until cooked (I prefer to use less oil and turn the meat rolls until all sides are cooked). Cut diagonally into 1 inch slices.
Serve as a side dish with rice.
Rye bread and why it should be left to the professional
Yesterday was certainly a busy breadmaking day. Aside from Pizza, Rémi also finally put his rye flour to good use. My conclusion is, unless you have a bread machine, it's more worthwhile letting the baker earned that 5 bucks.
It's just too time-consuming. Three rounds of kneading, and two rounds of glazing, it took half the afternoon and night to complete the full course of making the bread, that due to inexperience, has rooms for improvement (although I would say that his rye bread is excellent, given that it's his first time making it).
I've grown up on soft white bread and love the softness of those traditional white bread loaf you spread your kaya and butter on. Not the commercial square white bread you use for making those triangular sandwiches. So it took me a while to get used to those harder country bread that the French loves.
The French takes much pride in their bread, almost like they do with their cheese. In France, it seems that you can't call yourself a boulanger unless you have some certification, and artisan bread are highly valued.
For the undeterred, I reproduce the recipe from the "Making Fresh Bread" cookbook.
Ryebread
Makes 1 large loaf
450g rye flour
225g strong white bread flour plus extra for dusting
2 tsp salt
2 tsp brown sugar
1 and 1/2 tsp easy blend dried yeast
425ml lukewarm water
2 tsp vegetable oil
1 egg white for glazing (we used milk)
Sift the flours and salt together into a bowl. Add sugar, yeast and stir to mix. Make a well in the centre and pour in the lukewarm water and oil. Stir with a wooden spoon until the dough begins to come together, then knead with your hands until it leaves the side of the bowl.
Turn out on a lightly floured surface and knead for 10 minutes, until elastic and smooth.
Brush a bowl with oil. Shape the dough into a ball, put in the bowl and cover with a damp tea towel. Leave to rise in a warm place for 2 hours, until the dough has doubled in volume.
Brush a baking sheet with oil. Turn out the dough on a lightly floured surface and knock back with your fist, then knead for a further 10 minutes. Shape the dough into a ball, put it on a prepared baking sheet and cover with the damp tea towel. Leave to rise in a warm place for a further 40 minutes, until the dough has doubled in volume.
Meanwhile, preheat oven to 190C. Beat the egg white with 1 tsp of water in a bowl (if you're using it for glazing). Bake loaf for 20 minutes, then remove from the oven and brush the top with the glaze. Return to oven and bake for a further 20 minutes.
Brush the top of the loaf with the glaze again and return to the oven for a further 20-30 minutes, until the crust is a rich brown colour and the loaf sounds hollow when tapped on the base with your knuckles. Cool before serving.
Ying-Yang Rectangular Pizza
Pizza, along with guacamole, counts as one of the frequent dish we make when we entertain.
As usual, Rémi would be the bread-maker, ensuring that we have a crispy thin crust that we could cut easily with a pair of scissors.
And our pizza is never round. We always make a rectangular shape crust and line it on the big black oven tray. It is just perfect for feeding four persons, or two persons over two meals.
Being maker of your own pizza, you get to choose your own topping, and we normally have two sides with different flavours.
Below is our pizza dough recipe, that makes two big rectangular crust. You may consider freezing the second one for use another day. To freeze, roll out the dough to desired shape, line with baking paper, and gently roll the sheet like a scroll of paper. Use within two weeks.
Pizza dough
makes 2 big rectangular crusts
12g yeast (ready to use dried yeast)
8g salt (I guess a pinch would do)
250ml water
500g flour
50g olive oil
1/2 can tomato paste
4-5 ripe tomatoes
Sift flour. Mix flour, salt, yeast and oil. Mix with water and knead for 10 minutes. May need to add more flour if you find that the dough is too oily (or maybe reduce the quantity of oil).
Keep in the mixing bowl, covered by a damp towel, in a warm place for 60-90 minutes. Warm place could be on an open oven door, with the oven switched on at low temperature. Or beside the fridge.
The dough should have doubled in size. Knead lightly and press out the uneven pockets of air. Roll to desired thickness and shape, but the thinner, the crispier.
Place the dough on a floured tray. Spread with tomato paste on the flattened dough. Lined with slices of tomatoes all over.
Spread with your desired toppings and bake in preheated oven at 180C for about 15-20 minutes.
Topping suggestions:
Fresh mushrooms
Onions
Bacon
Olives
Anchovy
Basil leaves
Calamari (how about stir fry in sambal first?)
Prawns
Salmon
Dash of mix herbs all over
Mozzarella cheese
Parmesan cheese
Somehow, we are lacking in imagination when it comes to pizza toppings and always end up with the same things every time.
Friday, November 14, 2008
Sexing up Fondant au Chocolat
Certain French and English words may have such vastly different meanings despite sharing the same spelling.
Lately, I have been translating recipes from Camille's Classic French cookbook using google's online translating tool (meaning I type out word for word the full French recipe onto the computer, without help from Remi). Some of the results can be quite hilarious.
Like the below Fondant recipe, one of the steps requires that I "rape" the chocolate. So, I was to learn later, to my relief, that I do not need to sexually assault my chocolates, but just to shred it to pieces.
Well, the French would have their fair share of jokes about English words. Like you will never see "add a little BIT" in a French recipe. This is because "bite" (pronounced 'bit')in French refers to the male sexual organ.
Other times, the direct translation is totally clueless. Like this chicken stew recipe requires me to cook potatoes by letting them "jump" in butter. Huhhh?!?! The original French word is actually simply "sauté".
Nevertheless, google translate is still 90% accurate in helping me decipher this melting chocolate cake recipe from Camille. And after all the trouble, Remi came home early to make the cake himself.
Fondant au Chocolat
serves 4
(if you only have a big cake mold, double the quantity)
100g dark chocolate (ideally about 70% cocoa)
100g butter
2 eggs
65g sugar
1/2 heap tablespoon of plain flour
Preheat oven to 150c. Butter the cake mold (small one), line with baking paper and butter it again. Don't forget to butter the sides too. Some people use individual serving ramekins, which works well too, like what we do here.
Melt the chocolate squares in a bain-marie (over a water bath). Do not burn the chocolate. Add the butter cut into small pieces and stir into the chocolate till it is melted.
In the following correct order and mixing well between each addition, add the sugar, flour and eggs. Don't know why, but stick to this sequence.
Pour the batter into the pan and cook the cake for about 35 minutes in the oven.
The oven should not be too hot so that the cake does not dry during cooking
Serve warm with vanilla ice-cream. The inside should still be warm and moist.
Note: Just like the guacamole, there's also one million superb ways to make a melting chocolate cake.
The never right way to make Guacamole
A perennial favourite among our friends whenever we have lunch or dinner parties in Singapore, the guacamole is super easy to make and easy to please.
A problem with buying avocados in supermarkets is that they are always not ripe enough. So be certain to buy a few days in advance, if you are planning to use it for entertaining guests. We have resorted to burying our avocados in our rice bucket, in the hope that it would ripen in time, but nope, it didn't work.
And I found out that there are as many ways of making guacamole as there are the number of people making them. Everyone have their concept of what they think are the essential ingredients to making the best guacamole. There's even a big debate out there as to whether tomatoes should be included. Many people use garlic, but I've never added it.
Well, here's my way of making what I like, and it's up to you to decide if you like it or not.
Guacamole
should be enough for 4 if used as a dip
2 ripe avocados
1 onion
Juice of 1 lemon
cumin powder
salt
1 tomato (optional, I've omitted this lately)
chili (the authentic Mexican way is to use jalapeno pepper, I use chili flakes or a thumb size of red chili, chopped)
Half the avocado and spoon out the flesh. Mash with a fork.
Chopped onions and tomato and chili (if using) finely. Mix into the avocado and sprinkle lemon juice, cumin powder and salt. I am generally quite generous with cumin powder, adding it until I feel it is strong enough.
Cover and chill for about half an hour before serving. Not recommended for keeping overnight, as the avocado tends to discolour quickly when exposed to air.
Serve with tortilla or tortilla chips. It's hard to stop dipping chips with it once you start.
Wednesday, November 12, 2008
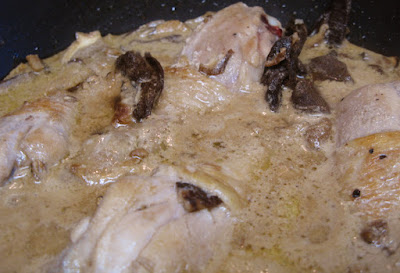
Of Morilles, Poularde and cream of chicken with forest mushrooms
Poularde de Bresse Aux Morilles is an interesting dish, that gives me a chance to introduce two very French food culture.
First is the Morel (or Morille in French), a very tasty but expensive mushroom popular in French cuisine. I remember buying a small bottle, say 20g for 20 euros a couple of years back. It is small compared to the big button or portobello mushrooms that we're used to, but just a little is enough to give a distinctive taste to your dish. So it's common to mix them with other cheaper variety of mushrooms.
And mushroom picking is perhaps unique to France, an autumn 'hobby' which I have unfortunately not had the chance to participate in yet. It is a convenient marriage of their love for hiking and food (They also have season for plucking wild berries). So a typical French household would have a book on mushrooms to help them identify edible and poisonous mushrooms. If in doubt, ask the local pharmacists. They are supposed to be trained to identify poisonous mushrooms as well.
Local knowledge is also essential in determining where are the best places to find mushrooms, and what is permissible by law so that one does not intrude into other people's private property. And not everyone is lucky, as there are about 30 deaths a year from eating the wrong mushrooms. Read more about this peculiar French hobby here.
A poularde, I learnt today from this blog, "is a fatty chicken that is grown in a particular way to avoid that it reaches sexual maturity. It consists of a young hen which is raised free range for the first part of its life and fed with corn, cereals and milk. Then just before it reaches sexual maturity, it is placed in a cage and maintained in the dark to be fattened for few weeks. In this way, the young hen do not reach sexual maturity, resulting in a very meaty bird (around 1.8Kg), covered of an important layer of fat, with a very tender, moist and milky flesh, but slightly on the bland side". Another distorted French way of rearing poultry, like what they do to geese for foi gras. The Bresse region of France is famous for poulardes.
I found this recipe of cooking "poularde from Bresse region with morels" in Camille's cookbook of classic French dishes. The word poularde caught my eye, because it is somewhat different from poulet, which is a "normal" chicken, and also because the recipe asks for a "beautiful" poularde. Weird isn't it? Maybe it's just a stupid French romanticism for their food.
Me and Remi have cooked this dish several times in Singapore to great compliments. And of course, we use a normal chicken, or chicken thigh pieces, to be precise. Having morels certainly helps to enhance the taste, but an assortment of dried forest mushrooms (which may be found in Carrefour or Cold Storage, though we had "imported" our mushrooms from France then) can be used in place of the morels.
I translate below the original recipe from Camille but give the dish another name more befitting what a non-French would understand and cook according to.
Cream of chicken with forest mushrooms (Poularde de Bresse Aux Morilles)
1 beautiful poularde from Bresse (or a young hen), cut into pieces
200g fresh morels (or use an assortment of forest mushrooms, fresh or dried, or just simply button mushrooms)
30g butter
glass of yellow wine of Jura region
200ml fresh cream
salt and pepper
In a frying pan, heat the butter and cook the chicken pieces without browning them.
Add salt, pepper and cover. After about 15 minutes, drizzle with the wine, cover again and simmer for 20 minutes.
Put the cleaned mushrooms in the pan with cream. Simmer half covered for 10-15 minutes until the broth has been reduced. Serve immediately, with rice or potatoes.
And trust me, despite the crappy picture above, this dish is easy to make, very tasty, even if you do not use chicken from Bresse, or wine from Jura, or mushrooms from Paris (button mushrooms is incidentally known as champignons de Paris).
Tips:
- To prepare mushrooms, cut the foot and plunge them for 10 minutes in cool water to remove sand.
- If using dried mushrooms, soak in warm water for 30 minutes. As the water is bursting with the flavour of mushrooms, you may add them in together with the cream.
- For a proportion of about 6-7 drumsticks, I finished my 30g bottle of dried mushrooms.
- Yes, yellow wine does exist, although a Singaporean friend of mine has been sneered by a French lady for saying that. It is unique to the Jura wine region of eastern France. Can use white wine in place of the yellow one.
- The suggested proportion in the recipe is just a guide. Adjusting the amount of cream, mushrooms, wine and butter according to your own instincts works too.
Tuesday, November 11, 2008
Lemon and Almond Biscuits
My quest to use up the fresh lemons in my fridge is still on-going. Last night, dinner was roast lamb shank, seasoned with lemon juice, olive oil, lots of garlic...c'est bon! Dessert came in the form of lemon biscuits with vanilla ice-cream.
Now, this lemon biscuits, recipe from Christelle le ru, is supposed to be quick and easy. Fast to make such that you basically just have to mix all the ingredients together, like the cupcakes.
Alas, it took me much longer, first because my other half forbid me from buying icing sugar. So I have to pound my own icing sugar from normal white sugar. Then, I have to further ground my own almonds from my current flaky almond stock. This took even longer, as all these grounding and pounding are done with a stone pestle and mortar. Now, my wish list for Christmas would be a proper blender! And being allowed to buy proper ingredients.
Second disaster came in the form of not watching over the oven even if I'm in the midst of a tasty dinner. So when the timer screamed, I was absolutely horrified to see almost burnt cookies. Saving grace is that I still have one-third of the cookie mixture left for a successful second batch.
If not for the above two follies, this biscuit recipe is easy to follow and almost fail proof. And me and Remi couldn't stop licking the tasty uncooked paste from the mixing bowl.
Lemon and Almond Biscuits
Makes about 18
100g unsalted butter
100g icing sugar
1 egg, beaten
rind of 1 lemon
juice of half lemon
70g ground almonds
125g flour
raisins or half almond (optional, for topping)
Preheat oven to 180C. Grease a biscuit tray.
Melt the butter in a pan. Mix in icing sugar, egg, lemon rind and lemon juice. I use a hand beater, but using a wooden spoon may be fine too.
Add the ground almonds and flour and mix well.
Place spoonfuls of the mixture onto the prepared tray, leaving some room between each biscuit. You may like to top the biscuit with say raisin, almond. I topped with half cranberry for the burnt batch, but forgot to do it for the second batch.
Bake for 10-20 minutes or until golden brown. Leave to cool.
Friday, November 07, 2008
Pleasure in simplicity: Spaghetti with Garlic and Olive Oil
I used to take pride in the fact that homecooked food has allowed me the freedom to add as much ingredients as I like. Think pizza. It's not a surprise that my homemade pizza is overladen with more than enough ingredients, bursting with too much taste that the flavours of some food are buried among others.
This spaghetti recipe is surprisingly minimalist, and handy when your fridge is empty. It is also recommended as a hangover dish, according to my Olive Oil cookbook by Tess Mallos.
Spaghetti with Garlic and Olive Oil
Serves two
125g dried spaghetti (about a handful)
1/4 cup (70ml) extra virgin olive oil
3-4 cloves of garlic, thinly sliced
1/2 finger-length red chili, thinly sliced, chopped (optional)
1 big tablespoons chopped parsley
salt and black pepper
canned anchovy fillet, to serve (optional)
Toasted breadcrumbs
1 tablespoon olive oil
2 tablespoons soft white breadcrumbs
Prepare the toasted breadcrumbs first by heating olive oil and tossing the breadcrumbs over medium heat until golden and crisp. Takes just 1-2 minutes. Set aside.
Bring a large saucepan of lightly salted water to boil and cook the dried pasta until just tender. Remove from heat and toss with 1 tablespoon of extra virgin olive oil. Cover and set aside. It must be ready to use immediately after the next step.
Heat remaining olive oil and saute the garlic and chili over medium heat until fragrant and just golden. Do not overcook. Remove from heat and immediately pour into the pan with the spaghetti. Add parsley, salt and pepper to taste and toss until well blended.
Transfer to serving bowls and top with anchovy fillets and serve with the toasted breadcrumbs.
The toasted breadcrumbs may be optional, but they really make the pasta taste better. The chili is considered as the hangover cure.
Fresh parsley is always preferred to dried ones, but my pot of parsley is half dying, so have to use dried ones so that I don't kill my half-dead but still surviving parsley.
Milo cupcakes, Nutella cupcakes and double punch dark chocolaty cupcakes
My sis-in-law I.S. passed me her super easy cupcake recipes recently. So easy that her little girl is able to help her with stirring the mixture.
Now, being Milo addict, and Remi being an ardent fan of Nutella, I've decided to make chocolaty variations of the cupcakes, and all 3 versions turn out fabulously.
Now, her recipe is useful for those who do not have a kitchen scale.
As I'm used to weighing my ingredients on a kitchen scale rather than a measuring jug, I've possibly messed up the proportion of flour, sugar to butter by not converting millimeters to grams. But it still works!
Cupcake basic mixture
Makes 6 cupcakes
100g melted butter
100ml flour (I conveniently use 100g)
125ml sugar (I also conveniently use 125g, also used half white and half portion brown sugar as I ran out of white ones)
2 eggs
Melt butter and allow to cool.
Mix all ingredients well together in a big bowl using spatula.
Put the mixture/ batter into the paper cups for cupcakes. Enough for about 6 average sized cupcakes.
Bake at 200deg cel for about 15-20min. That's it!
Sprinkle icing sugar on top of baked cupcakes or serve warm with ice cream just to get that extra sugar boost! =)
Variations
Milo flavour: Stir 1 big spoon of milo into 1/3 of the cake mixture.
Nutella flavour: Take 2 teaspoons of nutella, and twirl them into 1/3 of the cake mixture
Double punch dark chocolate flavour: Stir a big spoon of cocoa powder into 1/3 of the cake mixture. Break 2 squares of 70% dark chocolate and stuff into the middle of each cupcake. The resulting taste is bitter dark chocolate flavour, which is what I like. So if you prefer sweeter chocolate taste, reduce the amount of cocoa powder and use milk chocolate instead.
And a sprinkle of almond flakes always works extra wonders!
Tuesday, November 04, 2008
Clarifying differences between squids, cuttlefish, octopus, sotong, calamari, and how to stuff squid with vegetables
Am I getting more sotong? I find myself asking questions that should have already been addressed in primary school science, like what is lamb and how is it related to sheep, or how many tentacles does a cuttlefish have, as opposed to a squid and are we talking about the same sea creature?
According to my Ultimate Book of Fish and Shellfish, they are "cephalopods" (now, this word is definitely new to me), a type of mollusc which makes them a closer relative to snails than to fish.
Cuttlefish: Has a flattened oval head and eight stubby tentacles and two long tentacles for catching its prey.
Squid: Has elongated heads and slender torpedo-shaped bodies. Also ten tentacles, two of which are very long. In French, squid is calmar; in Italian, it is calamaro...so now I know why we also call squid calamari. And finding that I am still having trouble telling squid and cuttlefish apart, Remi explains that squid has longer tentacles than cuttlefish.
Octopus: This is easier to differentiate, as it has eight equal-size tentacles and a roundish head.
And yes, it's not exactly that common, but we've sighted cuttlefish while snorkelling/diving in Tioman and Tarutao, just like on the right.
Now the confusing part. Using an online English-Malay translator, I try to clarify what exactly does the Malay word sotong stand for - squid, cuttlefish or octopus (Grilled sambal sotong is one of the must-haves when you go for beach holidays in Malaysia). Cuttlefish is translated as "sotong", squid is also translated as "sotong", and octopus is translated as "sotong kurita ". >00< And different websites give different answers. Total confusion.
The confusion seems to clear up when it comes to the cephalopods' Chinese names:
Cuttlefish: 乌贼/墨鱼/花枝
Squid: 鱿鱼
Octopus: 章鱼/八爪鱼
Except that I realise that what I thought for years to mean cuttlefish in Chinese is actually squid.
And a few fun facts about squid and cuttlefish.
Sotong, in Singlish/Malay lingo, also mean dumb like squid (even though squids have proven to be smart creatures)...used with "blur" which is a mental state somewhere between spacey, oblivious.
And in Chinese, "fry squid" (抄魷魚) actually mean you're being fired by your boss.
And the Chinese word for cuttlefish, 乌贼, literally mean black thief, in reference to its ability to emit black ink.
Now to the main point on how to cook Vegetable-Stuffed Squid. Other than carrots, I've interchangeably used red peppers or leek (as suggested by original recipe). It's quite flexible in terms of what type of vegetables you can use to stuff the squid.
Vegetable-Stuffed Squid
Serves two
2 medium squid, skinned and cleaned
2 tbsp of butter (it is absolutely important to use butter for the taste)
2 tbsp fresh white breadcrumbs
1 shallot, chopped
2 garlic cloves, chopped
1/2 peppers (red, yellow or green, you choose), finely diced
1 carrot, finely diced
1/2 cup chicken stock
olive oil
chopped parsley
salt and ground black pepper
2 tomatoes, sliced (optional)
Preheat oven to 220C. Cut off tentacles of squid and chop these finely. Set aside.
Melt half the butter in a large frying pan. Add fresh white breadcrumbs and cook until they are golden brown. Stir to prevent them from burning. Set aside.
Heat the remaining butter, add the chopped vegetables and cook until softened but not browned. Stir in the stock and cook until it has reduced and the vegetables are very soft. Season to taste with salt and pepper and transfer to bowl of breadcrumbs. Mix together.
Heat olive oil in frying pan, and add the chopped squid tentacles over high heat for 1 minute. Stir in the vegetable mixture, and then the parsley. Well, I used frozen squid, so I conveniently skipped this step.
Using a teaspoon or whatever, stuff the vegetable mixture into the squid tubes. Do not overfill them as the stuffing will swell during cooking. Secure with toothpicks.
Heat olive oil in pan and placed the stuffed squid in the pan and cook until they are sealed on all sides and lightly browned.
Transfer the pan to the oven (if it's oven proof, if it's not, to an oven proof dish, making sure you spoon out the leaked out juice into the dish) and roast the squid for 20 minutes.
For juicier results, lined the sides of the dish with sliced tomatoes, sprinkle some olive oil and herbs (like basil leaves, or oregano).
Serve with rice or cous cous.
Monday, November 03, 2008
Ice Lemon Cubes
I just learned today that 1 lemon is roughly equivalent to 50ml, which is about the volume of five ice cubes. And the zest of one lemon is equivalent to 1 teaspoon.
It's a lemony day today, as I exhausted my morning squeezing juice out of some 15 lemons.
You see, our friends B&Z are leaving Welly, meaning our free supply of organic, pesticide-free lemons is coming to an end. So we decided to pluck lemons from their bountiful tree one last time, and greedy we are, having gotten ourselves over maybe 30 lemons? There's just one big bag full that we didn't bother counting this time.
How to make full use of these lemons?
We reckon fresh lemons can last about 2 weeks in the fridge, but we're definitely not going to consume 30 lemons within 2 weeks.
So the idea is to squeeze lemon juice and freeze them in the ice tray, and when we need the juice, we just pop the lemon cubes into say, our ice tea...and taaaaddddaaarrr...refreshing ice lemon tea!
Maybe I should start a series of lemony recipes.
Sesame nightmare
Don't try this at home, unless your objective is to punish your other half by making him/her make this.
I found this Black Sesame Paste dessert recipe in my Cantonese cookbook and was very motivated to try it out myself.
Alas, the short description of the steps to making the sesame paste much underestimated the tediousness of the process, especially if one doesn't own a proper blender.
To achieve a supposedly smooth and watery sesame paste, one has to first stir fry the sesame seeds, grind them in a blender, sieve out the shells in a metal sieve, then sieve again through a muslin cloth.
Well, this is simply too tedious. From a full bowl of sesame seeds, I reckon the amount of paste left after the first sieve reduced my paste to less than half. Thankfully, I don't have a muslin cloth and conveniently skipped the 2nd sieve, proceeding on to cooking the paste. And also thankfully, Remi came to my rescue and helped me with blending the seeds with our hand blender, sieving the paste and cooking it.
Everything about the recipe is just wrong, and the resulting taste is also far from perfect. For so much work, I'd rather pay S$2.50 for my tasty bowl of black sesame paste. There's this very nice dessert shop named 记得吃 opposite Chinatown Point, along Upper Cross Street in Chinatown. Their steamed milk is also very good. Hmmmm....I'm missing all my favourite deserts...like mango desert with pomelo, almond paste, walnut paste, peanut soup with dumplings...
Friday, October 31, 2008
Lazy Peperonata and Mushroom Spaghetti
A lazy evening warranted a simple, easy to cook dish, that required minimal reference to recipes and washing. And the big red and yellow peppers bought last Sunday was screaming their wish to be devoured. So I got the inspiration to cook Spaghetti out of this sweet and sour peppers dish I had learnt from my Italian cookbook "Easy Italian in Minutes" sometime ago.
It's very simple, but not the fastest. Basically, it involves simmering peppers of various colours in olive oil for half an hour, and seasoning them with sugar, salt and red wine vinegar for a sweet and sour taste.
I ended up using just my yellow peppers. If you use a combination of red, yellow and green, I'm sure the dish would look prettier. And don't be tempted to just use green peppers, as red and yellow peppers are crucial in adding a touch of sweetness to the dish.
Lazy dessert after dinner came in the form of a perennial favourite of Remi: Melted dark chocolate with sweet pears and vanilla ice-cream. He always makes sure we have a bar of dark chocolate in our store cupboard for such decadent delights. Melt chocolate with milk over a water bath for the perfectly thick and rich consistency.
Peperonata and Mushroom Spaghetti
Serves two
1 yellow pepper (or even better, combine half red and half yellow or green)
1 tablespoon olive oil
big handful of fresh button mushrooms
red wine vinegar
1 teaspoon sugar
salt
a few slices of chorizo or smoked ham
sprinkle of pine nuts
Spaghetti
Chopped parsley
Grated Parmesan cheese
Deseed and slice the peppers in long strips.
In the proportion of 1 tablespoon of oil to 1 pepper, heat oil in saucepan and add the peppers, tossing well to coat them in oil.
Fry over low heat, covered and simmer for 30 minutes until the peppers are soft. You don't really have to watch over it. Add the mushrooms sometime in between, say after 15 minutes. Season with sugar, vinegar and salt. Proportion of vinegar about 1 tablespoon or less, depending on taste. Can also replace red wine vinegar with balsamic vinegar.
Add the chorizo and pinenuts.
Meanwhile, cook the spaghetti and stir the cook pasta into the cooked peppers dish. Sprinkle with chopped parsley and cheese.
Tuesday, October 28, 2008
The colourful world of gingers, and the secret ingredient to fabulous nasi lemak
Until recently, I was absolutely confused by the colours of ginger, thanks to Enda. As she gave me verbal instructions on her various specialty dishes, even herself was colour-blinded by different species of ginger.
You see, blue ginger (also known as galangal, or lengkuas in Malay, or 南姜 in Chinese) is actually pinkish in colour. Yellow ginger (turmeric, or kunyit in Malay, or 姜黄 in Chinese) is more orange than yellow, while the common ginger is truly yellow.
Blue ginger is a key ingredient in Indonesian cuisine. And I must mention that Enda makes the most fragrant Nasi Lemak cooconut rice, and she attributes the taste to the blue ginger.
So I was determined to stock up on blue ginger and delighted to find frozen ones in Wellingtonian Asian stores. I even found fresh ones sold by this young Asian man peddling herbs and spices like lemon grass and lime leaves at the Sunday market.
In Enda fashion, my Nasi Lemak here is served with Opor Ayam, an Indonesian stewed chicken in turmeric gravy. Accompanying vegetables are simple stir fried bean sprouts. And also the addictive Emping Melingo I brought back from Singapore, a type of cracker made from the seeds of gnetum tree. It ihas a slight bitter taste, so I got a sweet variety, that has been coated in palm sugar syrup.
As my handwritten recipe is very unprecise, I adapted the Opor Ayam recipe from my newly acquired cookbook, Indonesian Kitchen by Pancy Seng. Nasi Lemak recipe comes from Enda. Thumbnail picture below shows the Turmeric Chicken done by Enda. Note that instead of pounding up the lemongrass etc, she just sliced them.
Opor Ayam (Stewed Chicken in Turmeric Gravy)
Serves 2
Half chicken or 4-6 pieces of chicken (I only use thigh or drumbsticks)
1 tomato (optional)
200ml thin coconut milk
100ml thick coconut milk (I ran out of coconut milk, so I had skipped this part, but would have been good to follow through)
salt and sugar to taste
Paste:
2 candlenuts (buah keras)
1 stalk lemon grass
half thumb size blue ginger (galangal), about 15g
2 cloves garlic
1 small-medium size onion
Mixed spices
1 tbsp coriander powder
1 tsp cumin powder
1 tsp pepper
1/2 tsp turmeric powder
(In Enda's recipe, she uses only turmeric powder and pepper, so I'm sure it's alright if you skip the other 2 C powders)
Grind the paste ingredients.
Heat cooking oil and saute the ground paste until fragrant. Add mixed spices (add a little water to form a paste) and stir fry evenly.
Toss in chicken and stir fry for 2-3 minutes. Pour in think coconut milk and bring to boil. Switch to low heat, cover and simmer until chicken is cooked.
Add salt, sugar and thick coconut milk and cook until chicken is tender. Add tomatoes and stir briefly. Serve hot with plain or coconut rice.
Nasi Lemak (Coconut Rice)
Serves two
1 cup rice
3/4 cup water
3/4 cup coconut milk
a few slices of galangal
1 pandan leaves, tie into a knot
a pinch of salt
According to Enda, the proportion of water must be more than that of coconut milk. So adjust accordingly, also to the type of rice you use.
Steam in rice cooker.
Subscribe to:
Posts (Atom)